Creating a JavaScript Barcode Scanning App From Scratch
In this tutorial, we will build an app that uses barcode scanning from scratch. The aim is not to build a production-ready, real-world app, but instead illustrate how common scanning workflows can be implemented using the SDK's capabilities and plain JavaScript/HTML/CSS.
The app is deployed under https://pixelverse-llc.github.io/inventory-tracking-app/ and full source is available on GitHub.
Inventory Tracking
The app that we'll build will do inventory tracking. The user signs into to the app and can borrow items (e.g. a laptop) from a storage locker, and return them later. Tracking of physical items is a task that is often done using barcode scanning.
Tech Stack
In frontend development, there are always a lot of different ways to achieve the same thing for any given task. For this tutorial, we have chosen a deliberately minimal approach that should be easily adaptable to your framework of choice.
Vanilla JS/HTML/CSS (No Framework)
We are going to implement the app without using any frontend frameworks or libraries, relying only on the baseline capabilities available in modern web browsers – JavaScript, HTML and CSS.
This might seem like an odd choice, but STRICH is framework-agnostic and aims to work well in any web environment. We encourage you to try building an app with just the core Web primitives – it's a refreshing experience.
No Styling
We will not use any styling beyond basic layout and making the buttons touch-friendly. We will make it functional and have acceptable UX. The app will not look beautiful.
Feel free to add some style to the app if you want!
No Backend - localStorage Only
To keep things simple, the app will not use a backend and instead use localStorage to store the currently logged-in user and borrowed inventory.
No Build Steps, No NPM
No build steps like bundling and minification involved. The HTML, JS and CSS that we create can be opened as-is.
How the App uses Barcode Scanning
The app will use barcode scanning for two purposes: user identification and item scanning.
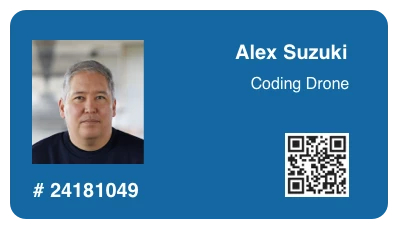
Scanning Badge QR Code
The app will require an user to scan a QR Code printed on a hypothetical badge before items can be borrowed. We'll assume the QR Code contains a string of digits, like the one below.
Scanning Inventory Items
Items are borrowed and returned by scanning the 1D barcode printed on them. We assume that items are labelled using Code 128, Code 39 or EAN/UPC product barcodes.
Here's a screen recording of a user scanning three PlayStation games in quick succession:
Project Setup
Git Repository
We will store the app in a Git repository and use GitHub Pages to deploy it under a publicly reachable, HTTPS-enabled URL. We'll assume that you are already familiar with Git, the de-facto standard for version control. If you haven't used Git before, we recommend GitHub's Getting Started documentation.
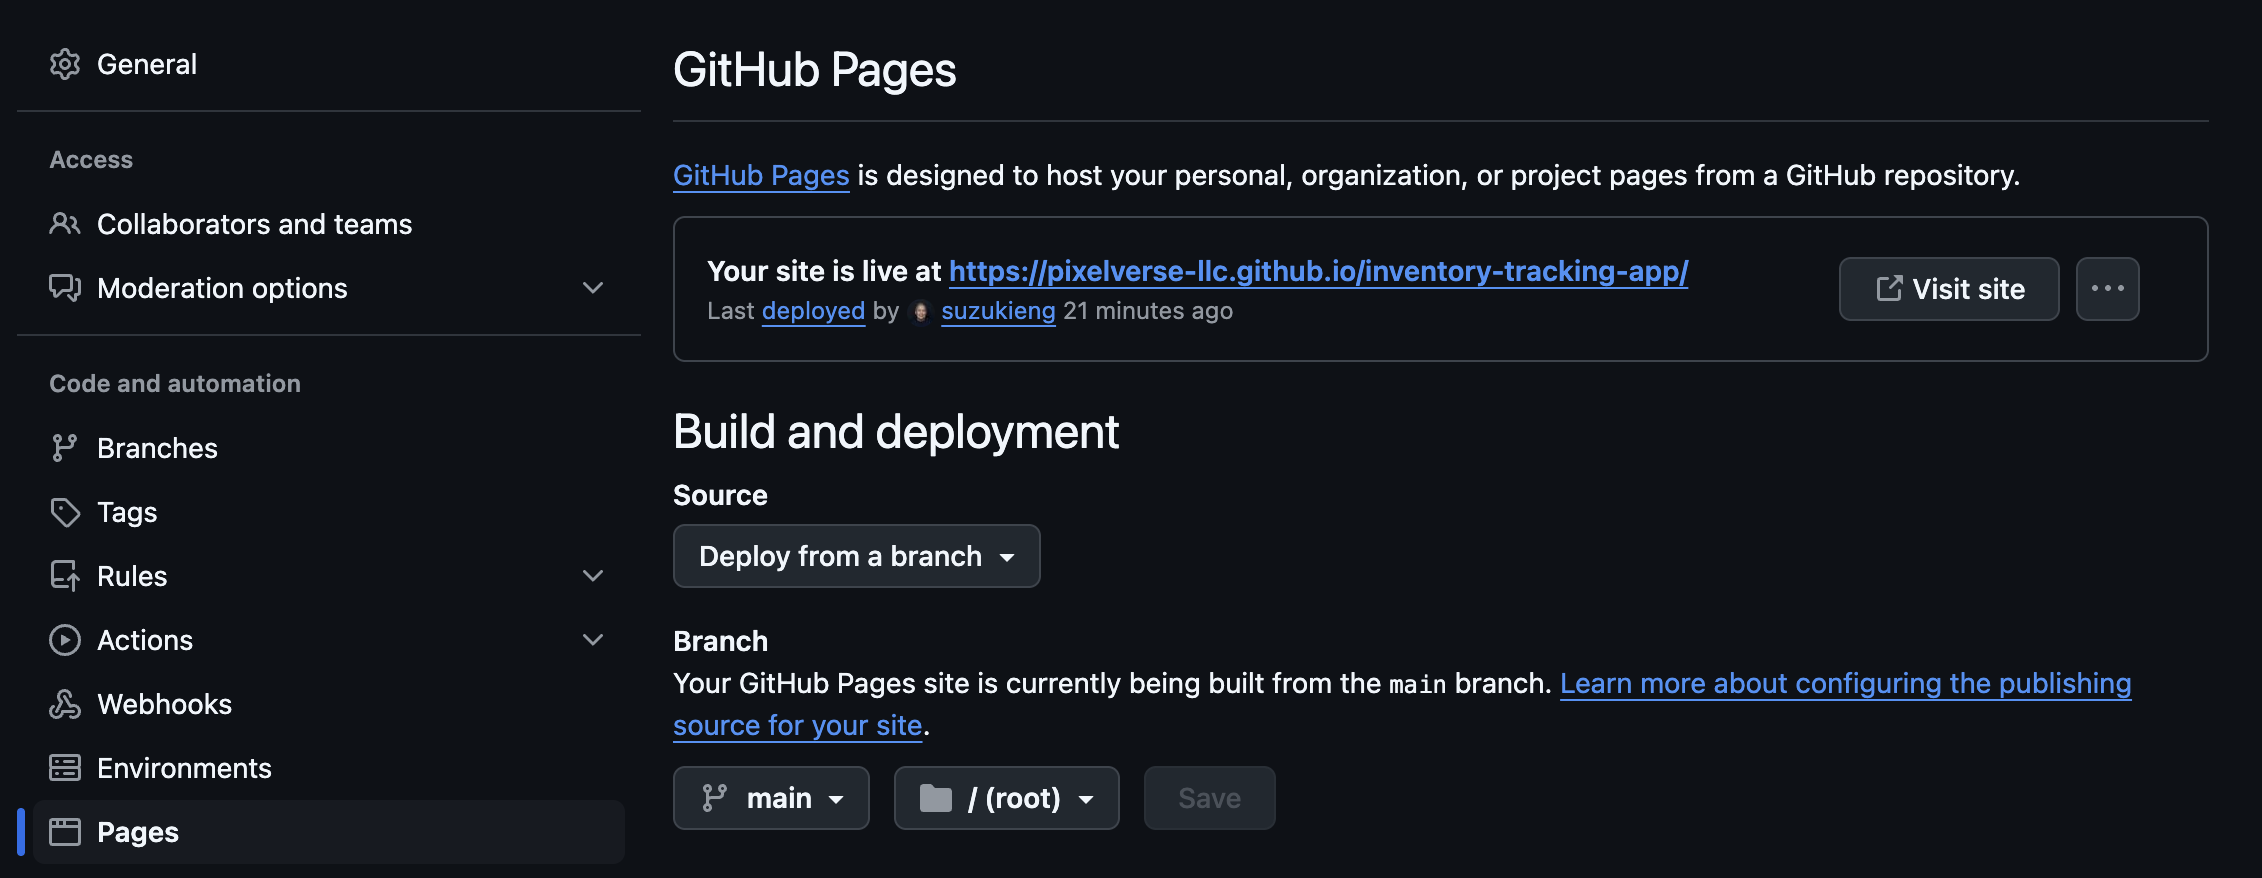
Create a new Git repository on GitHub. Then, in your repository settings, make sure GitHub Pages is enabled, and choose main as the branch and / (root) as the repository path from where to deploy your web app. Your settings should look similar to the screenshot below.
Clone your new Git repository to your local machine using the command-line, or a Git client of your choice, using the URL shown in GitHub. If you want to work directly with the final repository, run the following command:
Directory Structure
Our app consists of the following HTML, CSS and JavaScript files.
Path | Contents |
|---|---|
/index.html | Login and inventory screen |
/scan.html | Item scanning screen |
/css/styles.css | Global stylesheet (shared) |
/lib/authentication.js | User authentication module (shared) |
/lib/inventory.js | Inventory management module (shared) |
/img/badge_qr.webp | Badge image with QR Code |
Hello, World on GitHub Pages
Get started by adding an index.html file to the folder where you checked out your repository. Edit it and add a minimal Hello, world! document:
Add the index.html file to Git, commit it and push it to the main branch.
If everything is set up properly, you should be able to access your new GitHub Pages site via the URL https://USERNAME.github.io/REPOSITORY/ (URL will also be shown in the settings) after a short wait, and be greeted with your shiny new app:

Not terribly impressive, but you have a working GitHub Pages setup now! Feel free to play around with it until you're ready for the next step.
Optional: Run a Web Server Locally
For development purposes, it is useful to run a web server that serves the contents of the repository on your local machine. If you have Python installed (it comes pre-installed on macOS), you can launch a simple HTTP server with the following command:
You can then open your web app by opening the URL http://localhost:8000 in your web browser.
Obtaining a STRICH SDK License Key
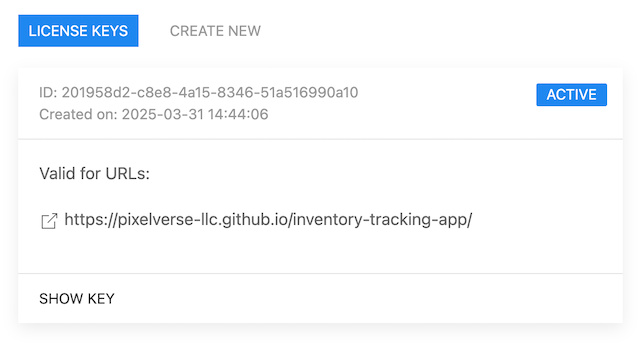
Next, you will need to get a license key for the STRICH SDK. Create an account in the Customer Portal and start the free trial. A credit card or PayPal will be required, but it will not be charged during the trial. Then create a license key, and when asked for a URL, use your GitHub Pages URL.
Building the Login Screen
Now that we have an SDK license key, we can start scanning some codes!
The first thing our users will see is a login screen. It will consist of a header, an image of a badge with a QR Code printed on it, and a button to scan the QR Code:
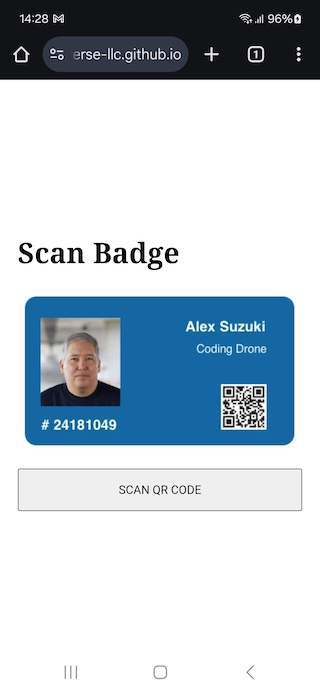
Adding a button to start scanning instead of starting it directly when the page has loaded is recommended, because it allows you to inform the user that access to the camera will be required, and for what purpose. Initially the user will have to grant permission to access the camera to the app, and if the reason is not clear and the prompt appears seemingly out of the blue, it will likely be denied.
Login Screen HTML
In the HTML for the login screen, we set a mobile viewport, include a CSS stylesheet (we'll create it later) and display the screen contents in a centered Flex container which will contain the header, image and button.
Update your index.html to match the snippet below.
Login Screen Stylesheet (CSS)
To style our app, we will use a CSS stylesheet and store it under css/styles.css. The CSS does a subset of what most CSS Resets do: use the more intuitive border-box box-sizing model, remove margins, and make images responsive.
We also make buttons more touch-friendly by making them full-width and increasing their height to 48px, the recommended size for mobile-friendly buttons.
The content of our screens will live inside a main element, which we will center in the screen using Flex layout.
For the full stylesheet, please check out the styles.css in the GitHub repository.
Login Screen Logic (JavaScript)
To fill the screen with some life, we need to add some JavaScript that:
Imports the latest version of the STRICH SDK as an ES6 module from the jsDeliver CDN.
Checks if the device has a camera using the hasCameraDevice method, and if not, displays an error message to the user.
Initializes the STRICH SDK using the license key we obtained previously.
Enables the SCAN QR CODE button, and makes it open a PopupScanner instance configured to read QR Codes. We don't do anything with scanned code yet.
Populate the empty script tag in index.html with the following JavaScript, and substitute the placeholder with your license key.
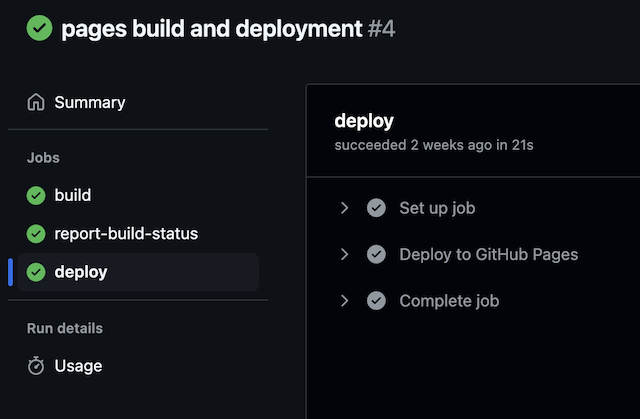
Committing and pushing the updated index.html file will cause a new version of your GitHub Pages site to be deployed.
You should now be able to see your new login page and trigger a QR Code scan. Try it out!
The Authentication Module
Our app uses the data in the badge QR Code to log the user into the app.
Since we do not have a real backend against which we could authenticate the user, we will simply treat the data encoded in the QR Code as the username, and store it in localStorage. We will encapsulate the login functionality in an ES6 module that can be shared between all pages that require access to the login information.
lib/authentication.js: Utility functions for storing the currently logged-in user
The lib/authentication.js module provides access to the name of the logged-in user, and functions for setting the logged-in user, and logging out.
To load the module in the login screen, import it along-side the SDK.
Building the Inventory Screen
After the user has logged in, we want to display the main screen: the list of borrowed inventory, and buttons for the primary actions.
The screen consists of a title, a list of items (barcode and count) and buttons to borrow or lend items. At the bottom, the username of the logged-in user is displayed, along with a button for logging out.
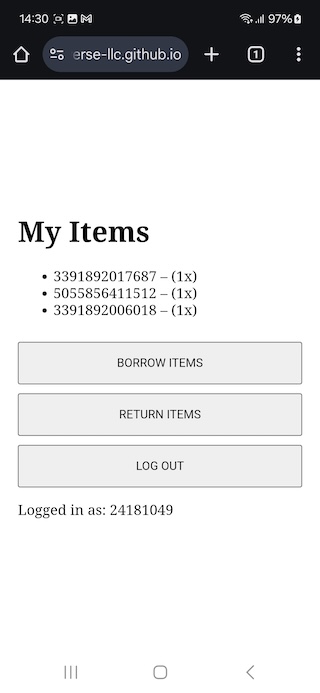
Inventory Screen Layout (HTML)
Add the following snippet as a child of the <main> element. The view is initially hidden, and will be shown only if the user is logged in.
The list items will be generated dynamically. We use an HTML template element for the list item template.
Inventory Screen Logic (JavaScript)
To switch between the logged-out and logged-in views, we have to extend the previous updateUI() function. Depending on the authentication state, it will either make the logged-in view or the logged-out view visible.
If the user is logged in, the borrowed inventory is loaded from a module that exposes a loadItems() function. The returned items are used to populate the list using the dynamically instantiated item template. If the borrowed inventory is empty, a placeholder is made visible instead.
We hook up the Borrow Items and Return Items buttons and make them navigate to a scan screen, passing a query parameter containing the mode (borrow or return). We disable the Return Items button if the inventory is empty.
At the bottom, we display the logged-in username and a button that logs the user out, clearing the inventory.
Check out the index.html file in the GitHub repository for the full code.
The Inventory Module
Where is loadItems() coming from? Similar to the authentication module, we create a module that encapsulates all interactions with the inventory:
Getting the list of borrowed items
Adding/removing an item
Clearing the list items
Since we are not using a backend, we will again use localStorage to store the borrowed items locally. For every item, a barcode and count are stored.
Adding an item that already exists increments the existing item's count. Removing an item decrements the count. If the count reaches 0, the item is removed from the list.
We use JSON to convert the array of items to a string and vice versa, suitable for storing it in localStorage.
Save the module's code in a file called lib/inventory.js.
Building the Scanning Screen
We've built the main screen, but our inventory is empty. The scanning screen is where we finally scan items and add them to the inventory.
The scanning screen will have two modes: borrowing items and returning items. Depending on the mode, the scanning screen will display a different title, and interact with the inventory module differently.
The barcode reader will be displayed on top, a label showing the number of items scanned and a Finish Scanning button below.
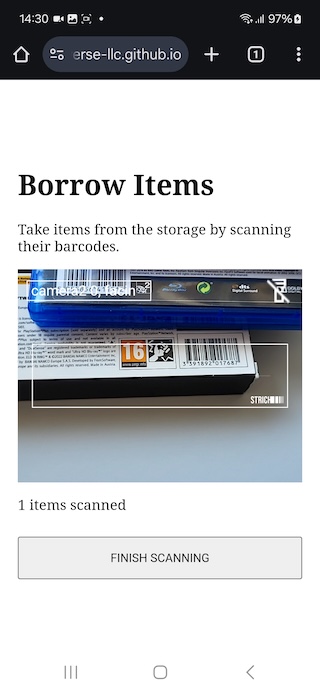
The screen will allow scanning multiple items in one go, making the Popup Scanner less suitable. Instead, we will use BarcodeReader, a more customizable integration. Check out the Getting Started Guide for more information about the different ways to integrate STRICH into your app.
Scanning Screen Layout (HTML)
Copy the index.html file and rename it to scan.html. Replace the <main> element with the snippet below.
Scanning Screen Logic (JavaScript)
The mode is passed to the screen via a query parameter, e.g. scan.html?mode=borrow.
Scanned items are accumulated in the onItemScanned() function and stored in the scannedItems variable.
Compared to scanning the badge QR Code, setting up the barcode scanning code here is a bit more complex. A BarcodeReader is created by invoking its constructor with a Configuration object. The configuration contains the list of barcode types (symbologies) to detect, as well as a parameter that suppresses duplicate scans, and most importantly, the host element. The host element is the HTML element that will contain the visible elements of the BarcodeReader. It needs to have a fixed size and use relative positioning.
When a barcode is detected, the BarcodeReader is instructed will invoke the onItemScanned() callback, which accumulates the item in the scannedItems variable.
After we've configured the BarcodeReader, we initialize and start barcode detection. When scanning is finished, we destroy the BarcodeReader and navigate back to the main screen.
Add the following JavaScript snippet to the <script> tag in the scan.html file.
Putting it All Together
Commit your changes and push them to your GitHub repository. Wait a moment, and your changes should be ready and published on your GitHub Pages site.
Here's how the finished app should look like:
Conclusion
We've built a small but functional barcode scanning app using plain HTML, JavaScript and CSS. We used QR Code scanning to identify the user, and 1D barcode scanning to track physical items. We used localStorage to simulate user authentication and an inventory database. Finally, we stored the app in a Git repository and deployed it to GitHub pages to make it easily accessible.
We hoped you enjoyed this tutorial. If you questions or comments, please drop us a line.